Setting up Google Workspace SSO for Dagster+
In this guide, you'll configure Google Workspace to use single sign-on (SSO) with your Dagster+ organization.
Prerequisites
To complete the steps in this guide, you'll need:
- The following in Google:
- An existing Google account
- Workspace Admin permissions
- To install the
dagster-cloudCLI - The following in Dagster+:
- A Pro plan
- Access to a user token
- Organization Admin permissions in your organization
Step 1: Add the Dagster+ app in Google Workspace
-
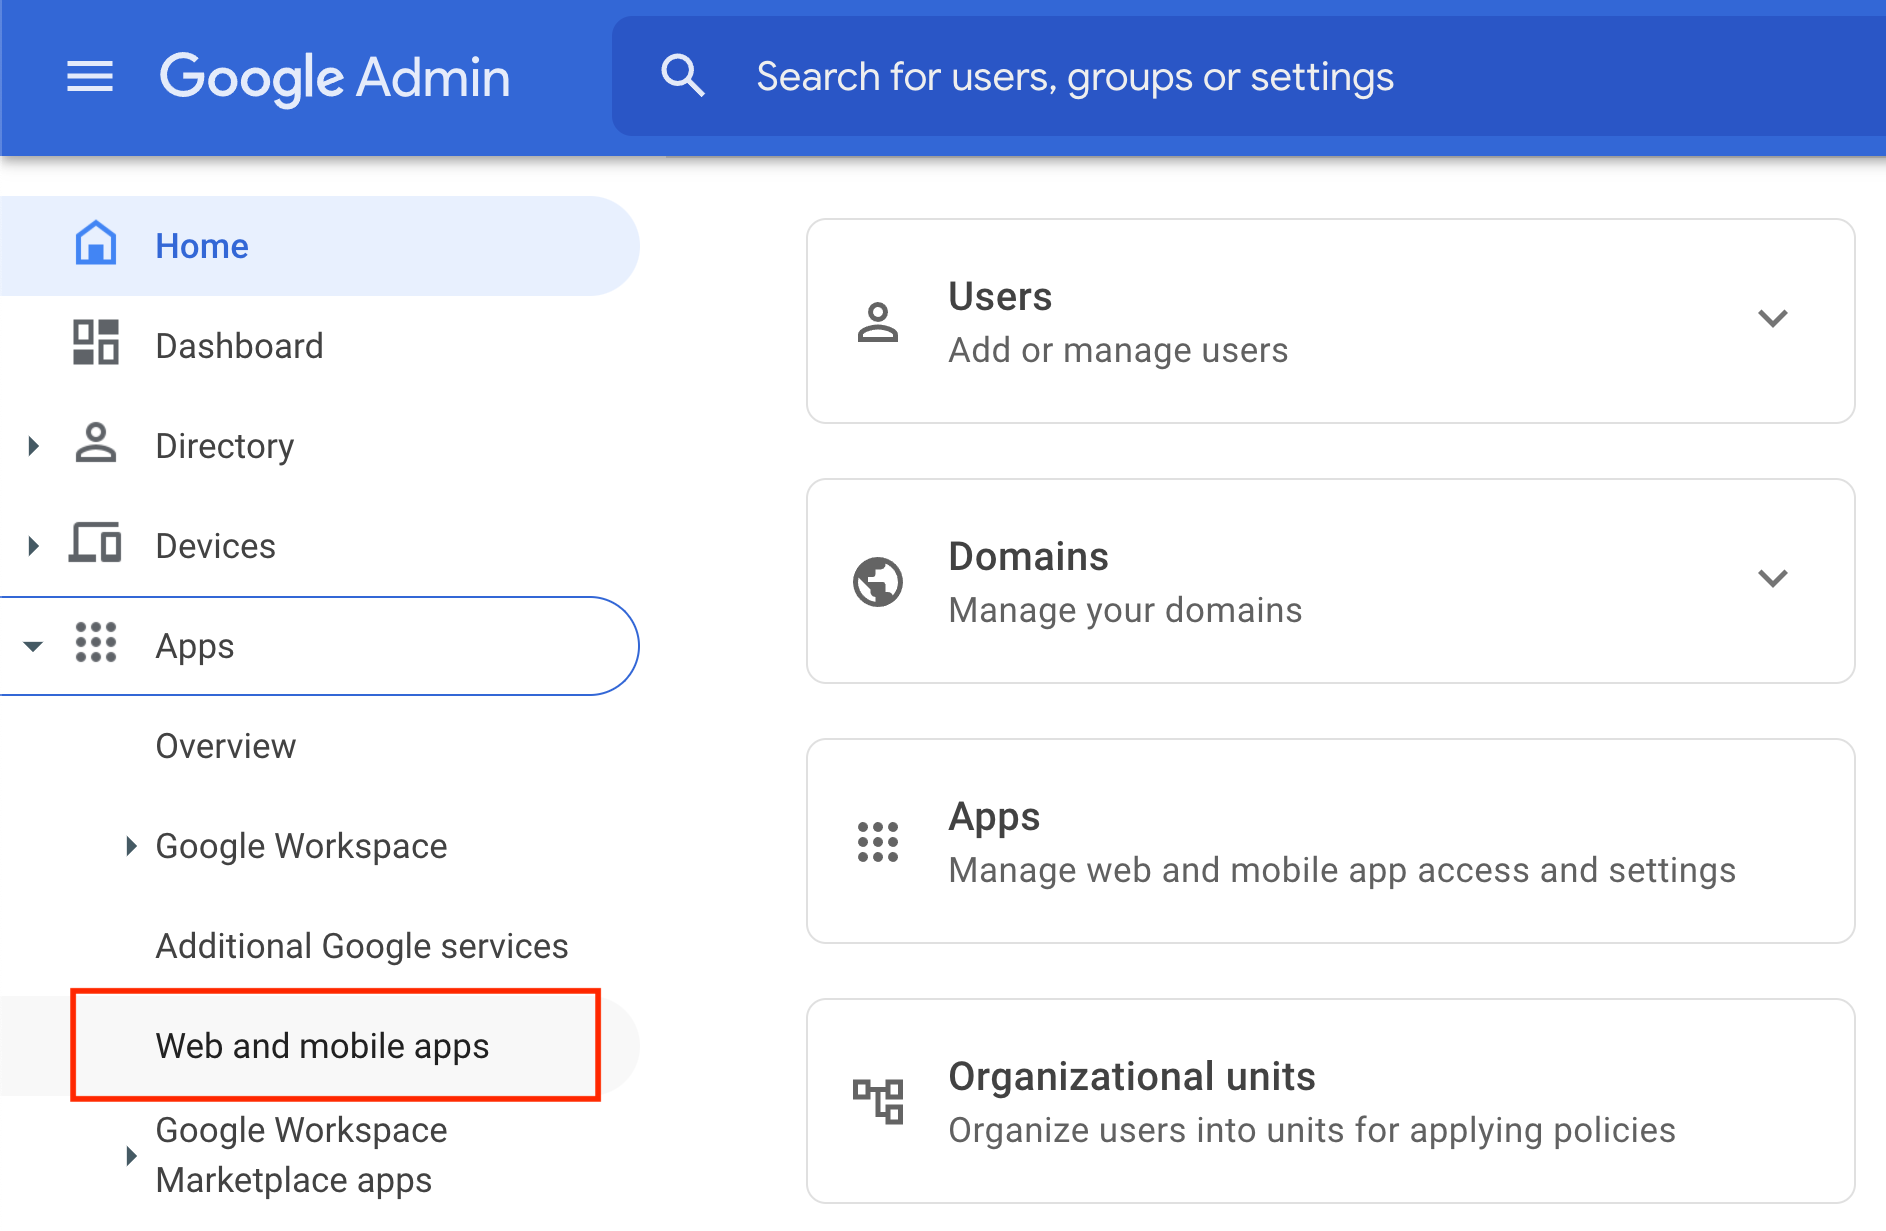
Navigate to your Google Admin Console.
-
Using the sidebar, navigate to Apps > Web and mobile apps:
-
On the Web and mobile apps page, click Add App > Add custom SAML app:
 This opens a new page for adding app details.
Step 2: Configure SSO in Google Workspace
-
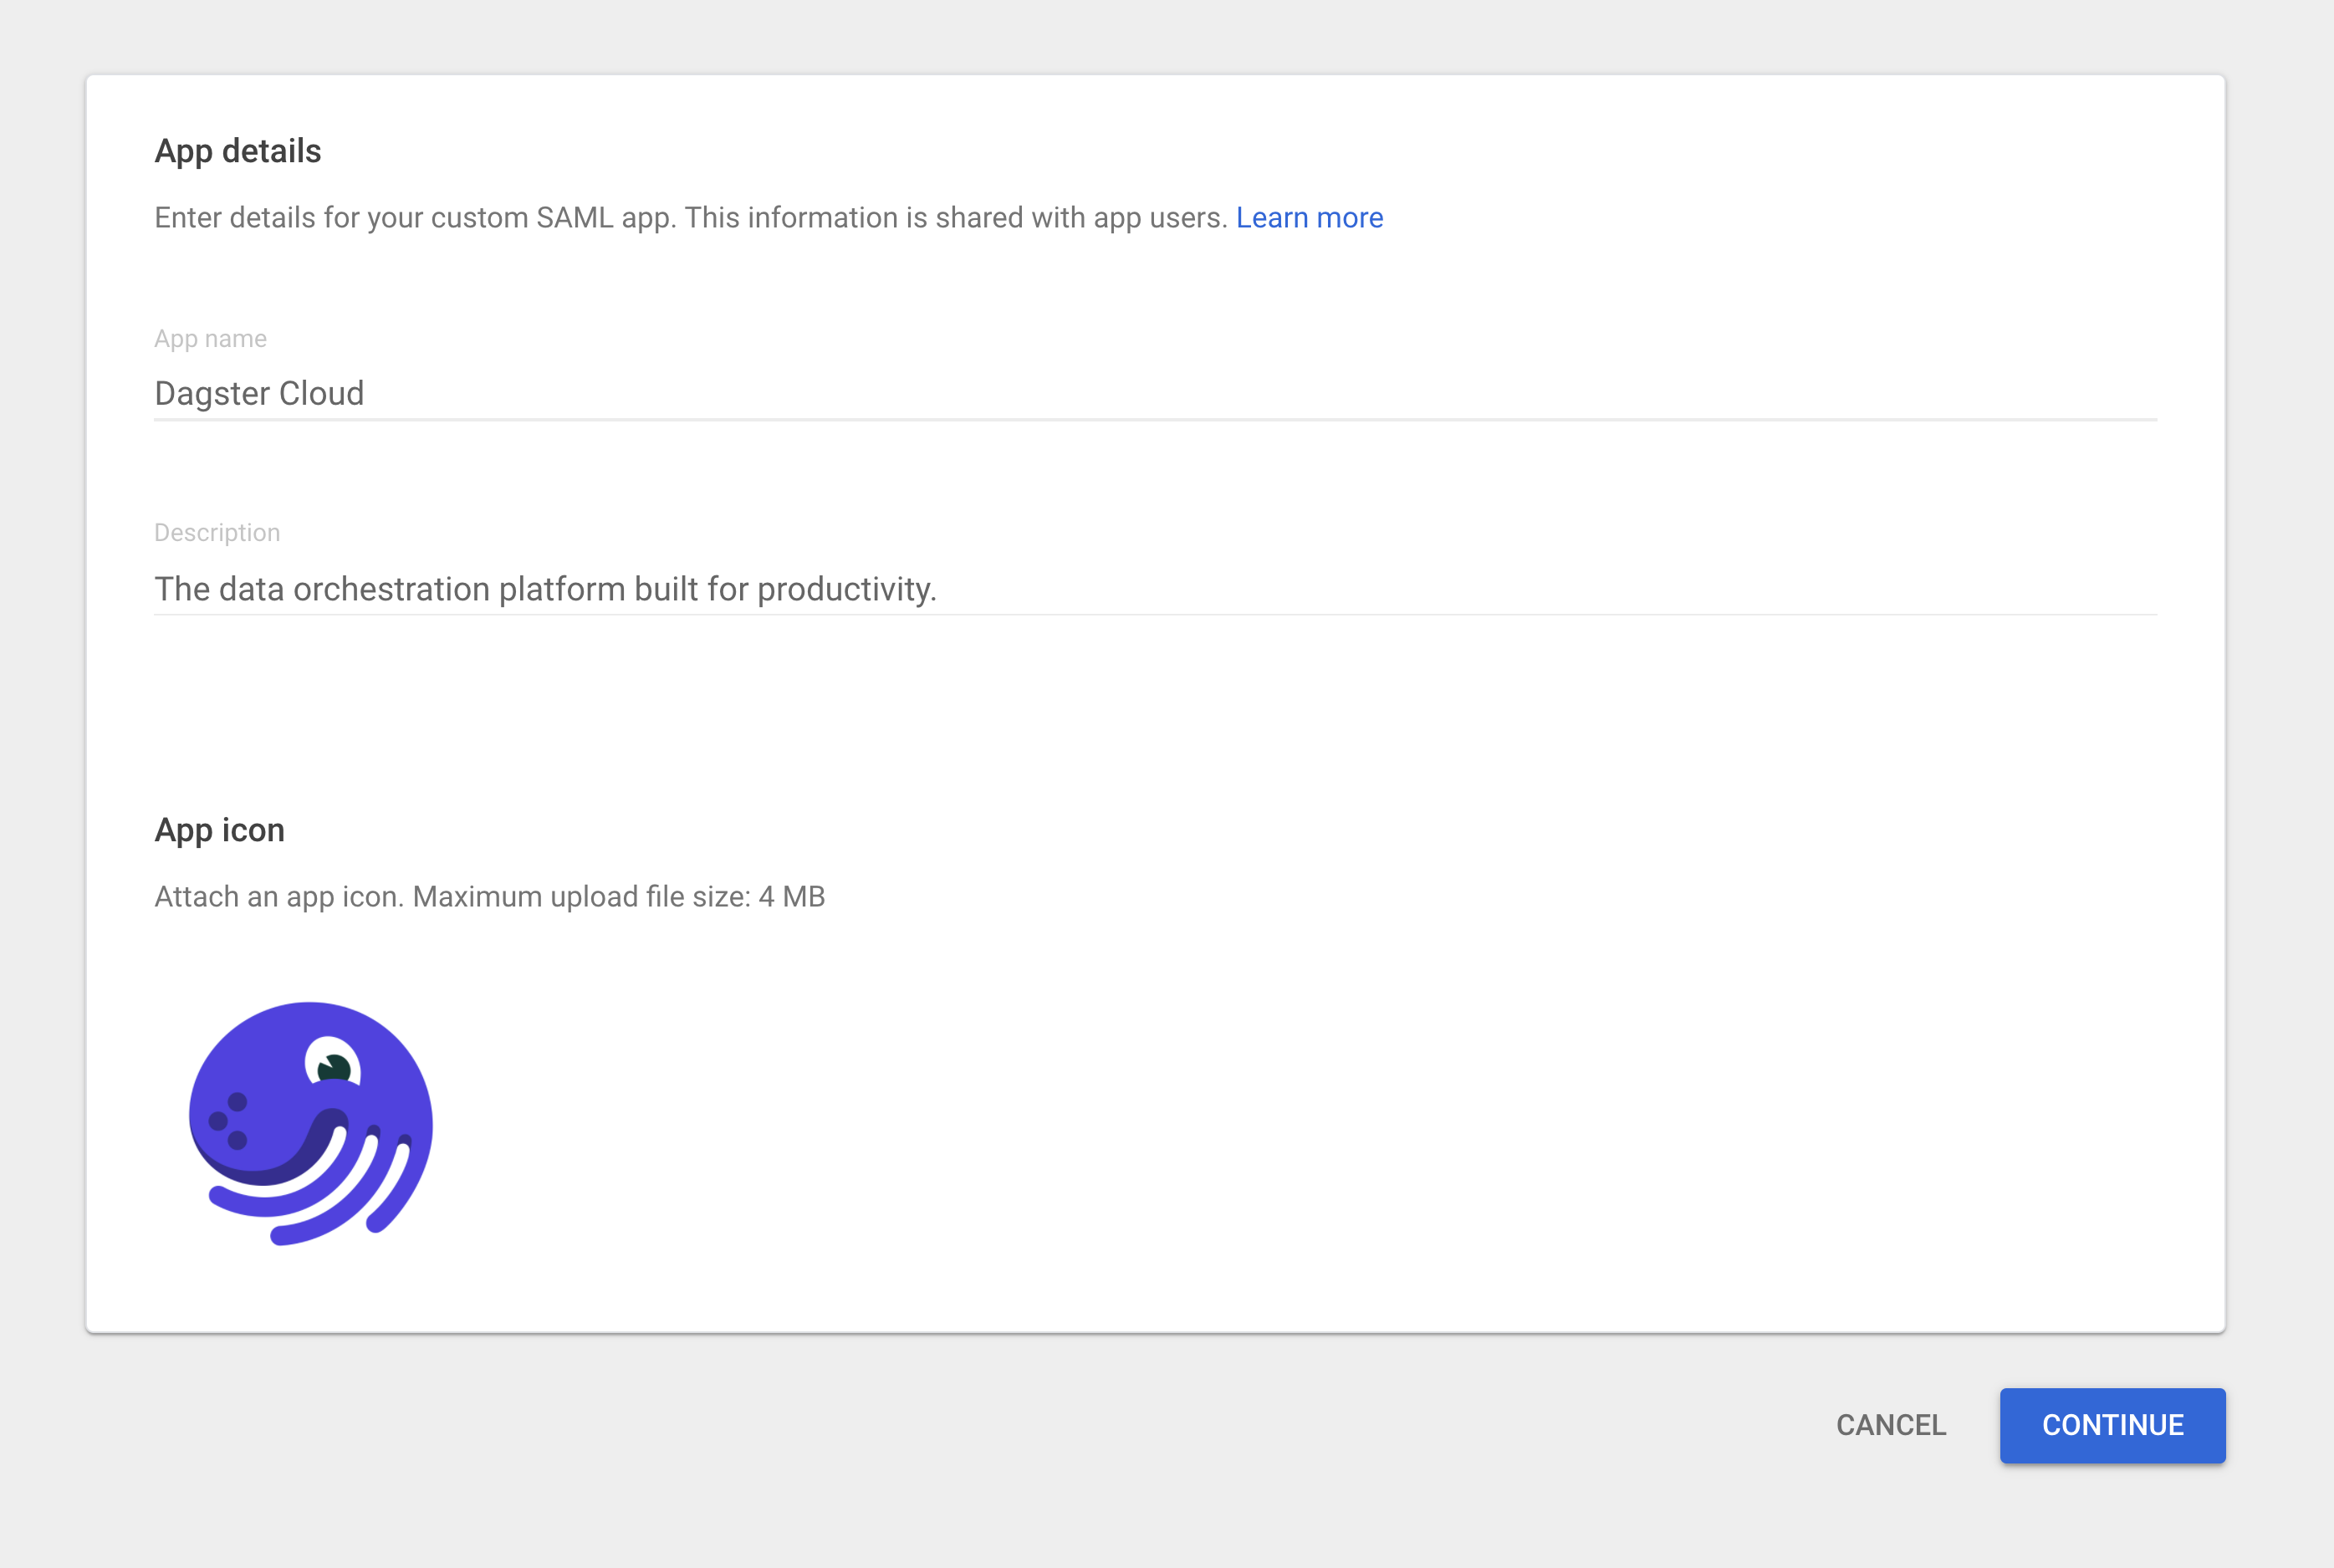
On the App details page:
-
Fill in the App name field.
-
Fill in the Description field.
The page should look similar to the following:
-
Click Continue.
-
-
On the Google Identity Provider details page, click Continue. No action is required for this page.
-
On the Service provider details page:
-
In the ACS URL and Entity ID fields:
Copy and paste the following URL, replacing
<organization_name>with your Dagster+ organization name:https://<organization_name>.dagster.cloud/auth/saml/consume -
Check the Signed Response box. The page should look similar to the image below. In this example, the organization's name is
hooliand the Dagster+ domain ishttps://hooli.dagster.cloud: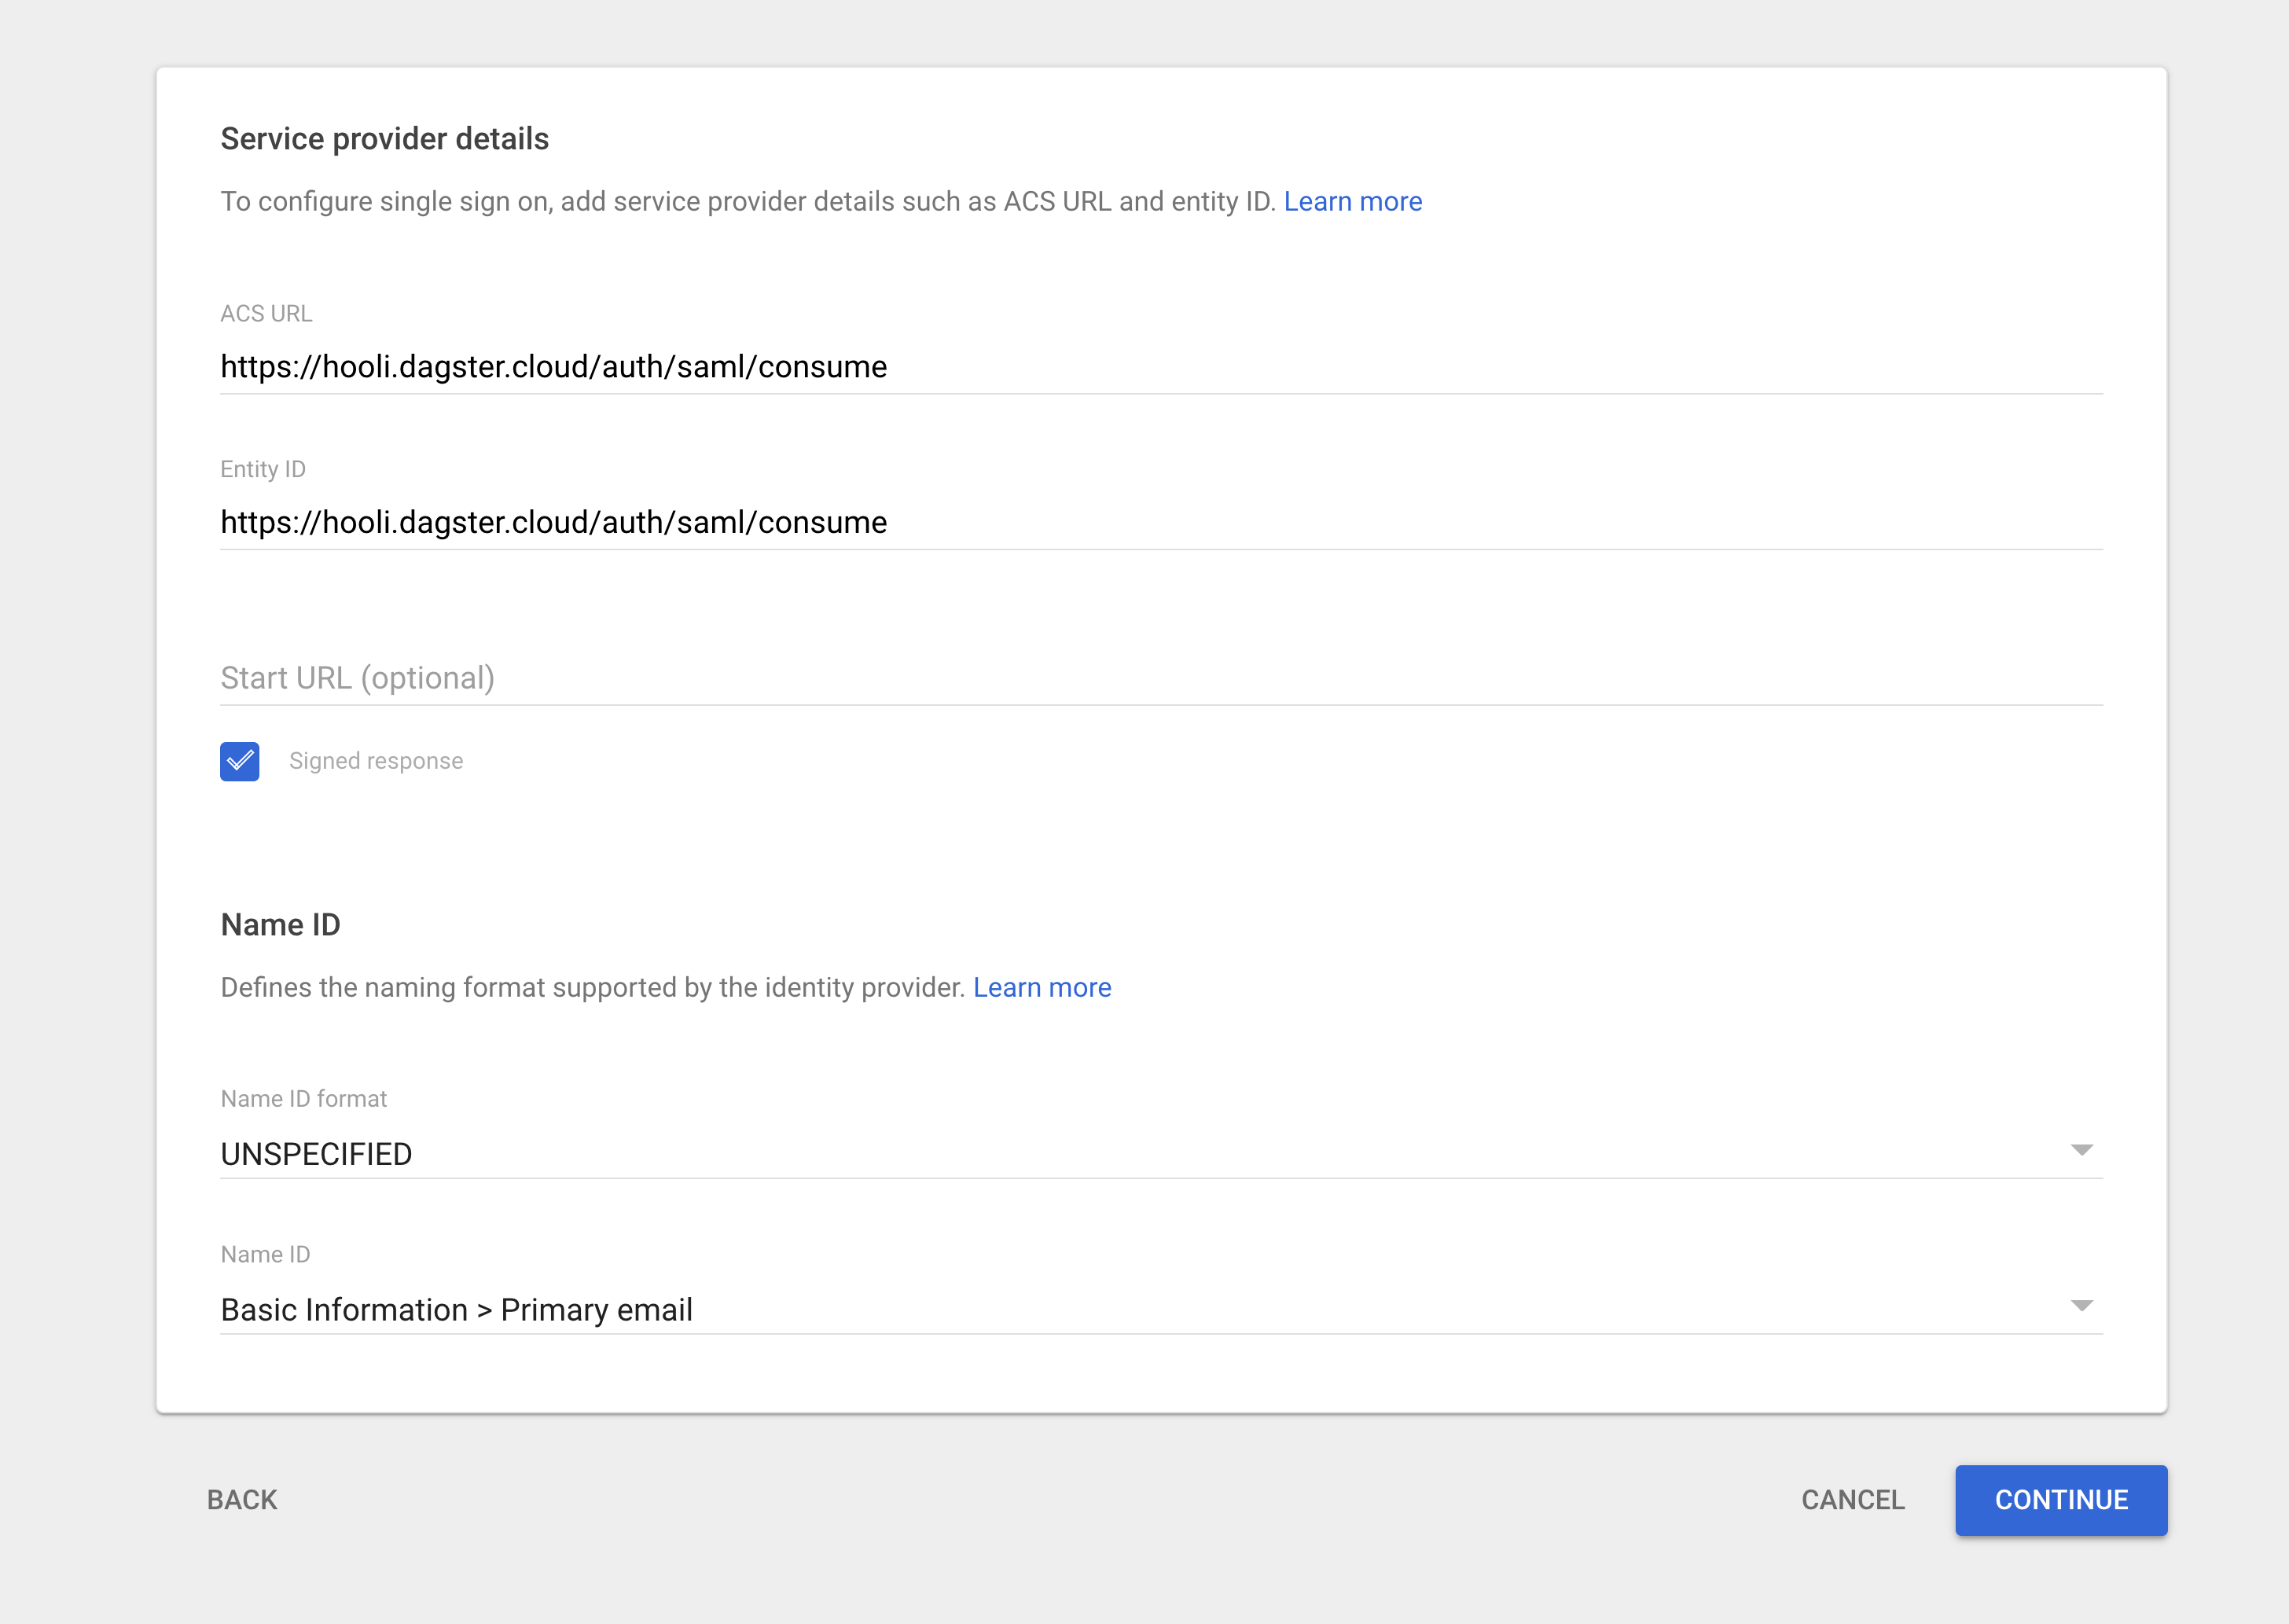
-
When finished, click Continue.
-
-
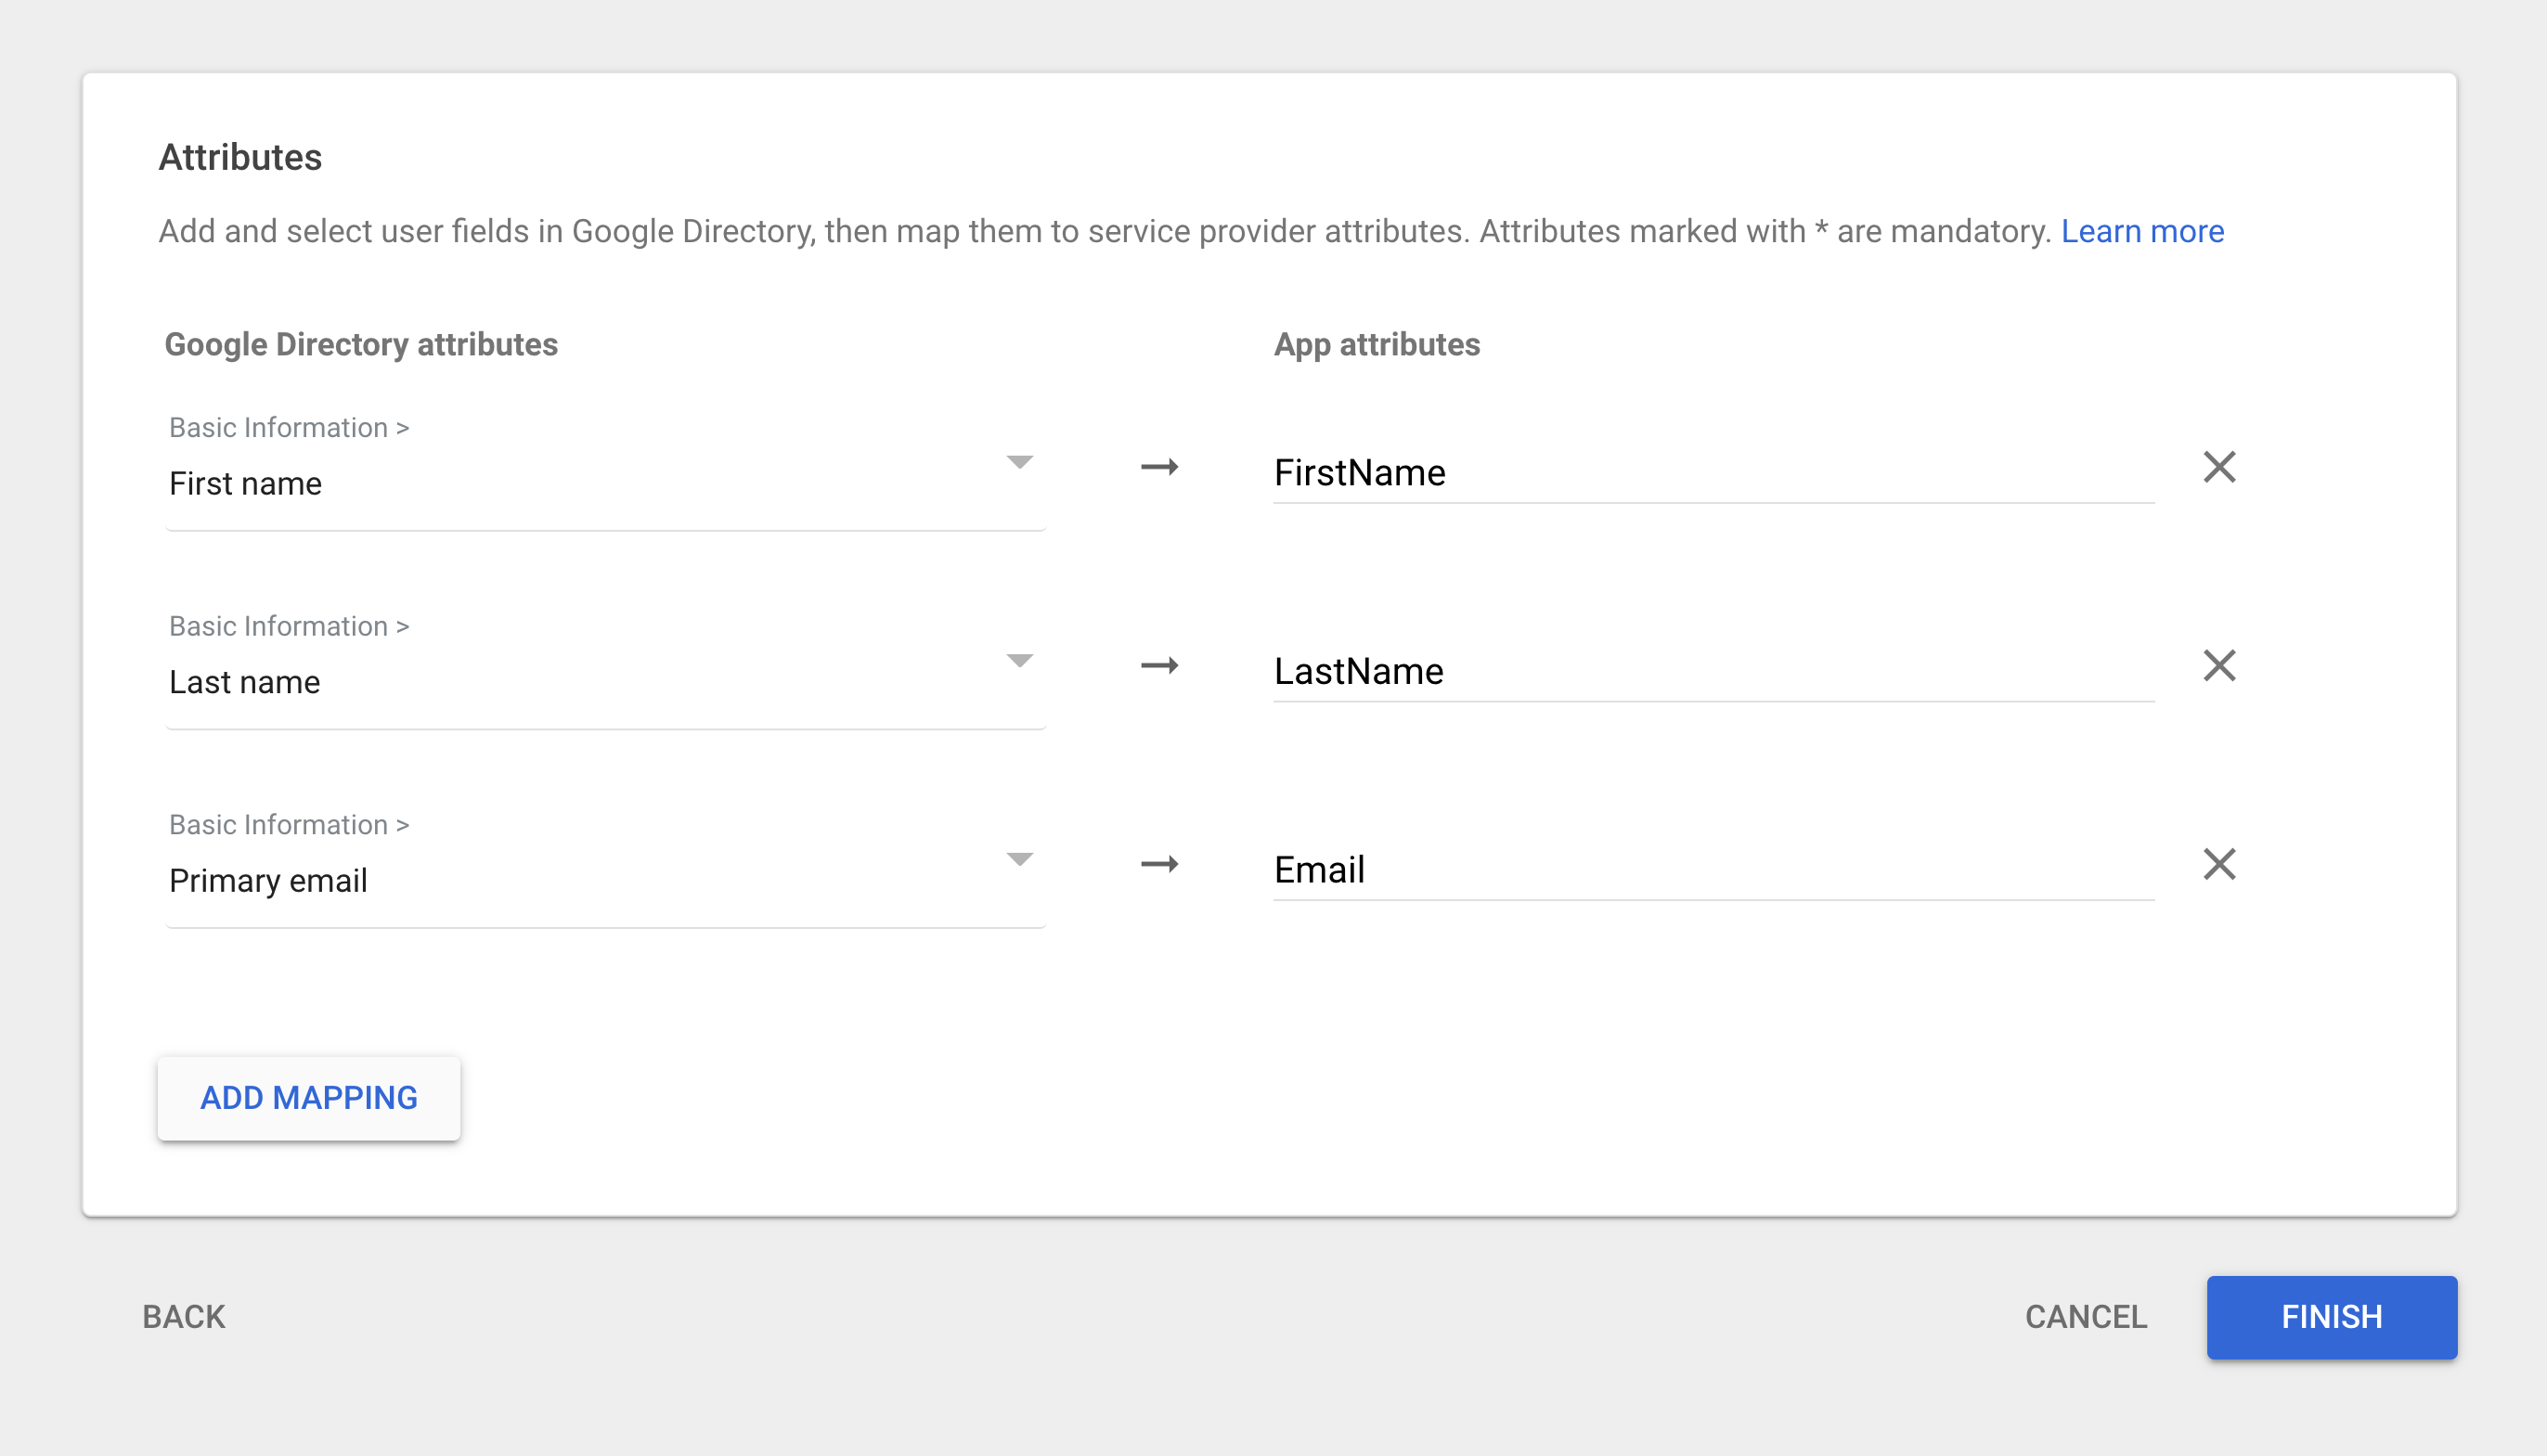
On the Attributes page:
-
Click Add mapping to add and configure the following attributes:
- Basic Information > First Name -
FirstName - Basic Information > Last Name -
LastName - Basic Information > Email -
Email
The page should look like the following image:
- Basic Information > First Name -
-
Click Finish.
-
Step 3: Upload the SAML metadata to Dagster+
Next, you'll save and upload the application's SAML metadata to Dagster+. This will enable single sign-on.
-
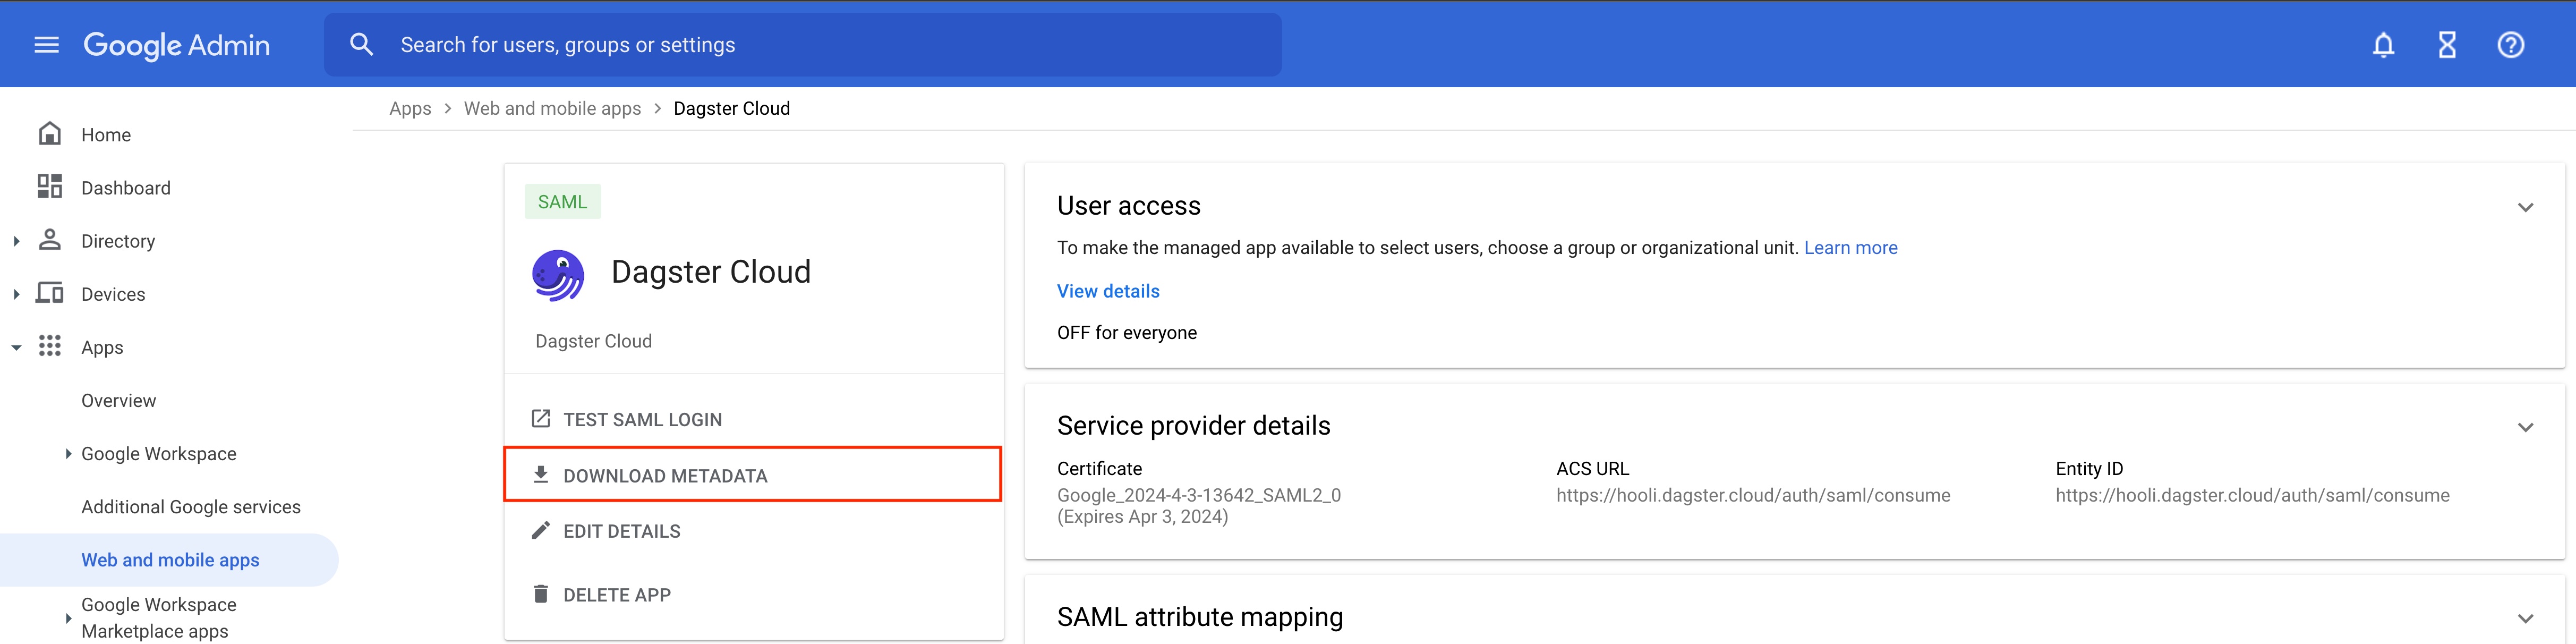
In your Google Workspace, open the Dagster+ application you added in Step 2.
-
Click Download metadata:
-
In the modal that displays, click Download metadata to start the download. Save the file to your computer.
-
After you've downloaded the SAML metadata file, upload it to Dagster+ using the
dagster-cloudCLI:dagster-cloud organization settings saml upload-identity-provider-metadata <the_path/to/metadata> \
--api-token=<user_token> \
--url https://<your_organization_name>.dagster.cloud
Step 4: Grant access to users
In this step, you'll assign users in your Google Workspace to the Dagster+ application. This allows members of the workspace to log in to Dagster+ using their credentials when the single sign-on flow is initiated.
-
In the Google Workspace Dagster+ application, click User access.
-
Select an organizational unit.
-
Click ON for everyone.
-
Click Save.

Step 5: Test your SSO configuration
Lastly, you'll test your SSO configuration:
Testing a service provider-initiated login
-
Navigate to your Dagster+ sign in page at
https://<organization_name>.dagster.cloud -
Click the Sign in with SSO button.
-
Initiate the login flow and address issues that arise, if any.
Testing an identity provider-initiated login
In the Google Workspace portal, click the Dagster+ icon. If successful, you'll be automatically signed into your Dagster+ organization.